remote control car © GPL3+
it is a remote control car that works with the arduino
_ztBMuBhMHo.jpg) |
| × | 1 | |
 |
| × | 1 | |
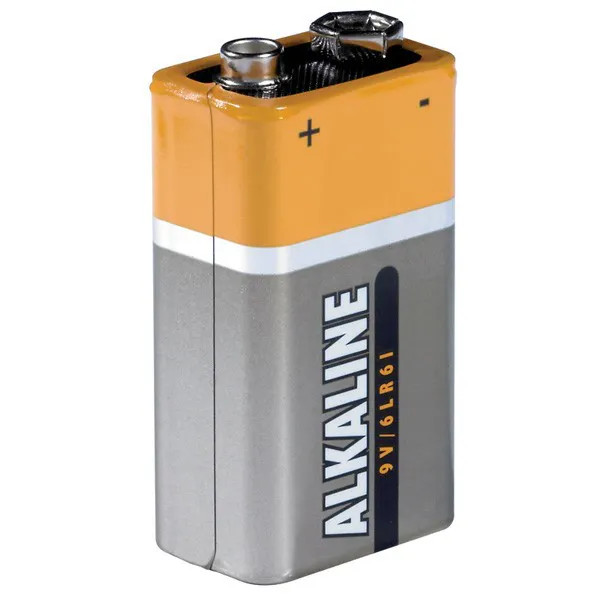 |
| × | 1 | |
 |
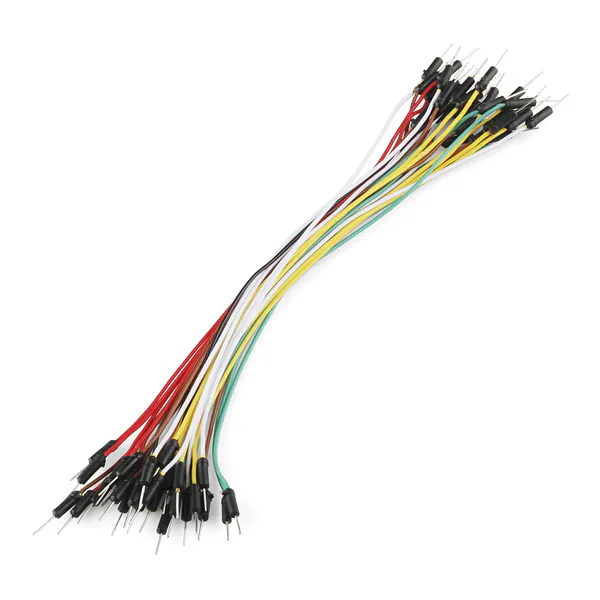
| × | 1 | |
| × | 2 |
remote_control_car.inoC/C++
Please log in or sign up to comment.
Team backsters
Rishabh sharma
- 4 projects
- 0 followers

rishi arora
- 11 projects
- 4 followers
Published on
Table of contents
Similar projects you might like
![]()
It is the next generation of remote control cars where signal attenuation is completely out of the picture.
IR — Remote Control Car
Using servo motor control with a TV remote control.
Servo Control with TV Remote Control
Project showcase by eldo85

Simple instruction to let you know how to control an AC voltage device using an IR remote control and the Arduino.
IR Remote Control and Arduino Control AC Voltage Device
![]()
Have you ever wanted to use a PocketBeagle? And build a remote car? Well, I have! Here is how you can too!
Remote Control Car w/ PocketBeagle and Arduino
Receive the signal and control an LED.
Control an LED with the Remote Control
Project showcase by Nicholas_N
- 43,040 views
- 17 comments
- 31 respects
![]()
This is a project I built from an item I found on Instructables author nipon4666 that I tweaked to correct an issue with high speed motors
IR Remote Control Car
Project tutorial by comptek4
- 24,954 views
- 22 comments
- 17 respects
Remote Controlled Car © GPL3+
Remote controlled Car designed to navigate a course and lift a small amount of weight.
| × | 5 | |||
|
| × | 1 | ||
| × | 1 | |||
 |
| × | 2 | ||
|
| × | 1 | ||
 |
| × | 1 |
This project was built for a competition, to compete against similarly designed cars. It had to navigate a course, then pick up a half a pound weight carry it up a thirty degree incline.
Once at the top, the weight was set in a cup across a ten inch gap. The car then had to pick up another weight across the gap and transport it back down the incline and drop it off. The car had to then maneuver back through the course to the finish.
Overall, the car performed really well. The chassie was built using some sheet and angle aluminum. The drivetrain consisted of tank style steering. The drive servos chosen were tower pro mg995 because of metal gearing and high torque. Wheels for the car were designed in Creo and were 3D rapid prototyped. The main crane arm was also 3D rapid prototyped. Both the crane and stabilizing arm were made of carbon fiber. At the end of the crane fork there was a very small wire used to pick the weight up. The stabilizing arm was used to make sure the car didn’t flip forward when the weight was being deposited or picked up from across the gap.
A Hitech 311 servo was fastened to the stabilizing arm. For the electronics and controls, a wireless Play Station 3 controller was chosen, that connected to a Bluetooth dongle. The dongle was then connected to the Arduino USB host shield, which was stacked on a regular Arduino UNO.
Once code was created, the driver servos and the stabilizer servo could be controlled directly from the ports of the Arduino USB Host shield. The crane was controlled by a Hitech mg485 servo that had been modified to be a DC motor. The motor was controlled by a two-channel relay board. The Arduino USB host shield sent a signal to the relay board to tell it when to send power to the motor, and in what direction.
After the car was designed, assembled, and some of the kinks were worked out, it was ready for competition. The car performed very well on the day of competition, posting the fastest time to complete the course. I would like to think my team members for their time and hard work (Darrin Small, Glen Smith, Lauren Toma, Alex Yoon, Dmytro Zaytsev, and Ximin Zhao).
RC Car with Remote Arduino (Without external motor shield)
A version of the RC Car that uses Remote Arduino to allow a Windows device to control the motors without using an external motor shield.
|
| × | 1 | ||
| × | 1 | |||
 |
| × | 1 |
In this project we will create a version of the Bluetooth RC Car with Remote Arduino that can be build without an external motor shield. This project is specific to the Maisto Tech RC Car (1967 Mustang). Since this project is proprietary for this specific car’s PCB, you may want to refer to the motor shield solution if you are using a different RC car.
In this project, we will modify an RC car to allow it to be controlled using Windows Remote Arduino via a Bluetooth connection! With Remote Arduino, it is possible to build a Universal Windows Application which will direct the car in any direction. We used a Lumia phone running Windows 10 to control the car with the built-in accelerometer!
You can download the «samples» repository here. This sample is «remote-controlled-car» inside the Win10 folder. Make sure to clone the repository recursively so that you also obtain a copy of the library (more info in the readme)!
If you’d prefer to create your own project, follow the project set up guide here
You can find the Windows Remote Arduino repository here
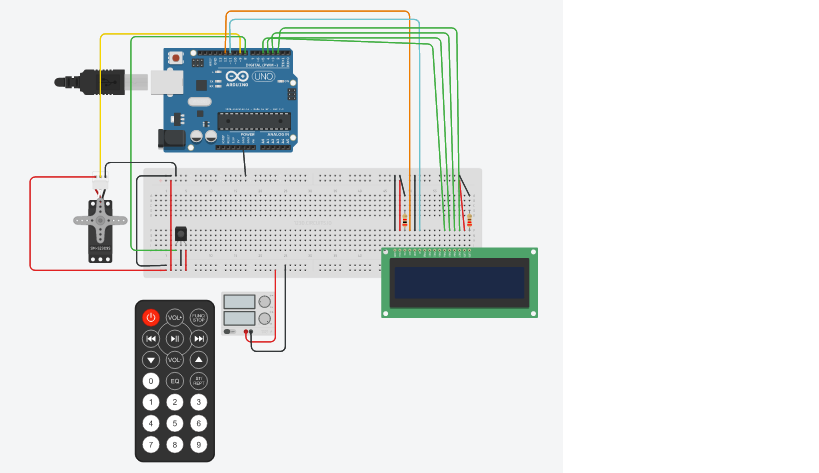
See the pictures below for an image-based overview of the set up process.
- Unscrew the bottom frame from the rest of the car.
- Remove the wire connectors from the circuit board and unscrew the circuit board from the bottom frame of the car.
- You should now have access to the base of the circuit board. You now have to solder 4 wires (preferable of different colors to avoid confusion) in the locations shown in the image below.
- The wires on the left go to pins 9 and 10 of the Arduino and the wires on the right go to pins 11 and 12. With reference to the images below, the connections will be as follows
- Red wire — Pin 8
- Brown wire — Pin 9
- White wire — Pin 10
- Green wire — Pin 11
- Now you can connect the front motor connector back to the circuit board.
- Next we need to get power to the Arduino. For this, first solder an additional power wire near the switch. Next, cut the ground wire going to the circuit board and hook up a barrel jack to the new power wire and the cut ground wire. This jack connects to the Arduino. Finally, take the ground wire from the circuit board and connect it to one of the 2 ground pins on the Arduino.
- Last, hook up the Bluetooth device to the Arduino by connecting a wire from TX on the Arduino to RX on the Bluetooth device and vice-versa. Also connect it to power and ground!
That is the last of the hardware setup steps! You can now screw the circuit board back on. You may also want to secure the Arduino don with zip ties in the area above the rear motor.
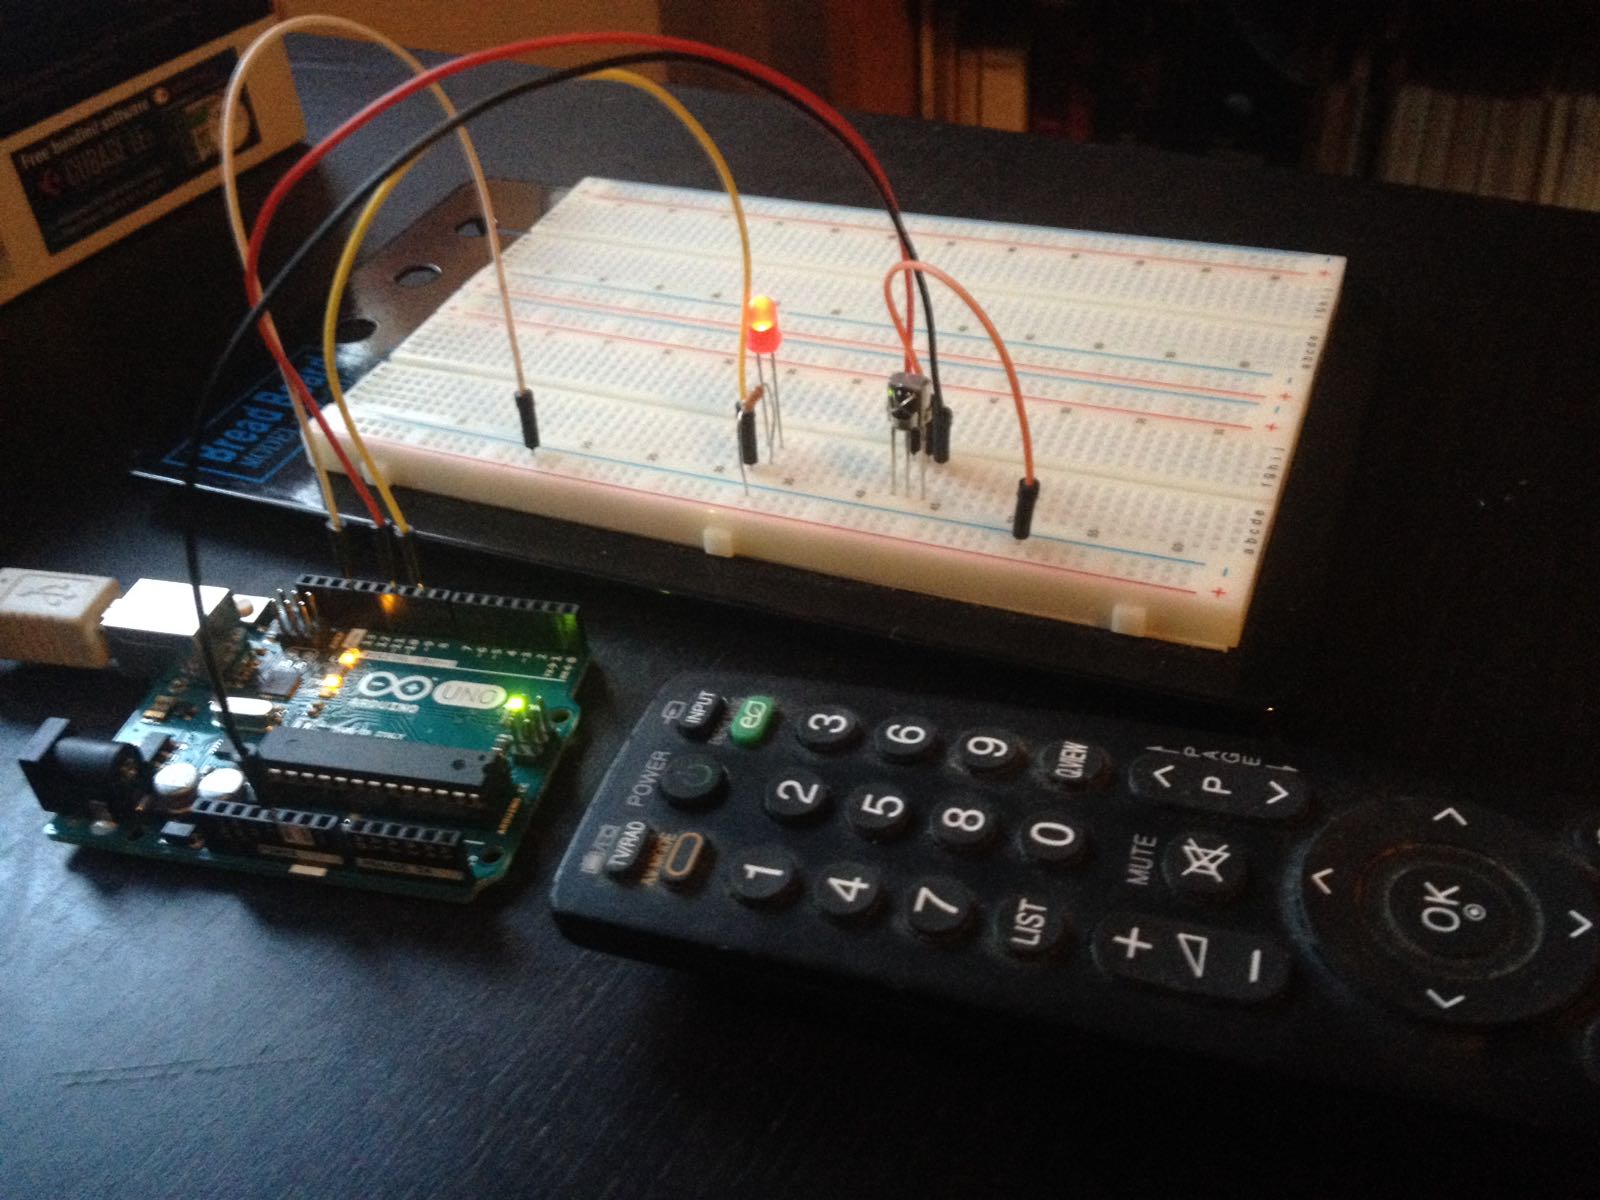
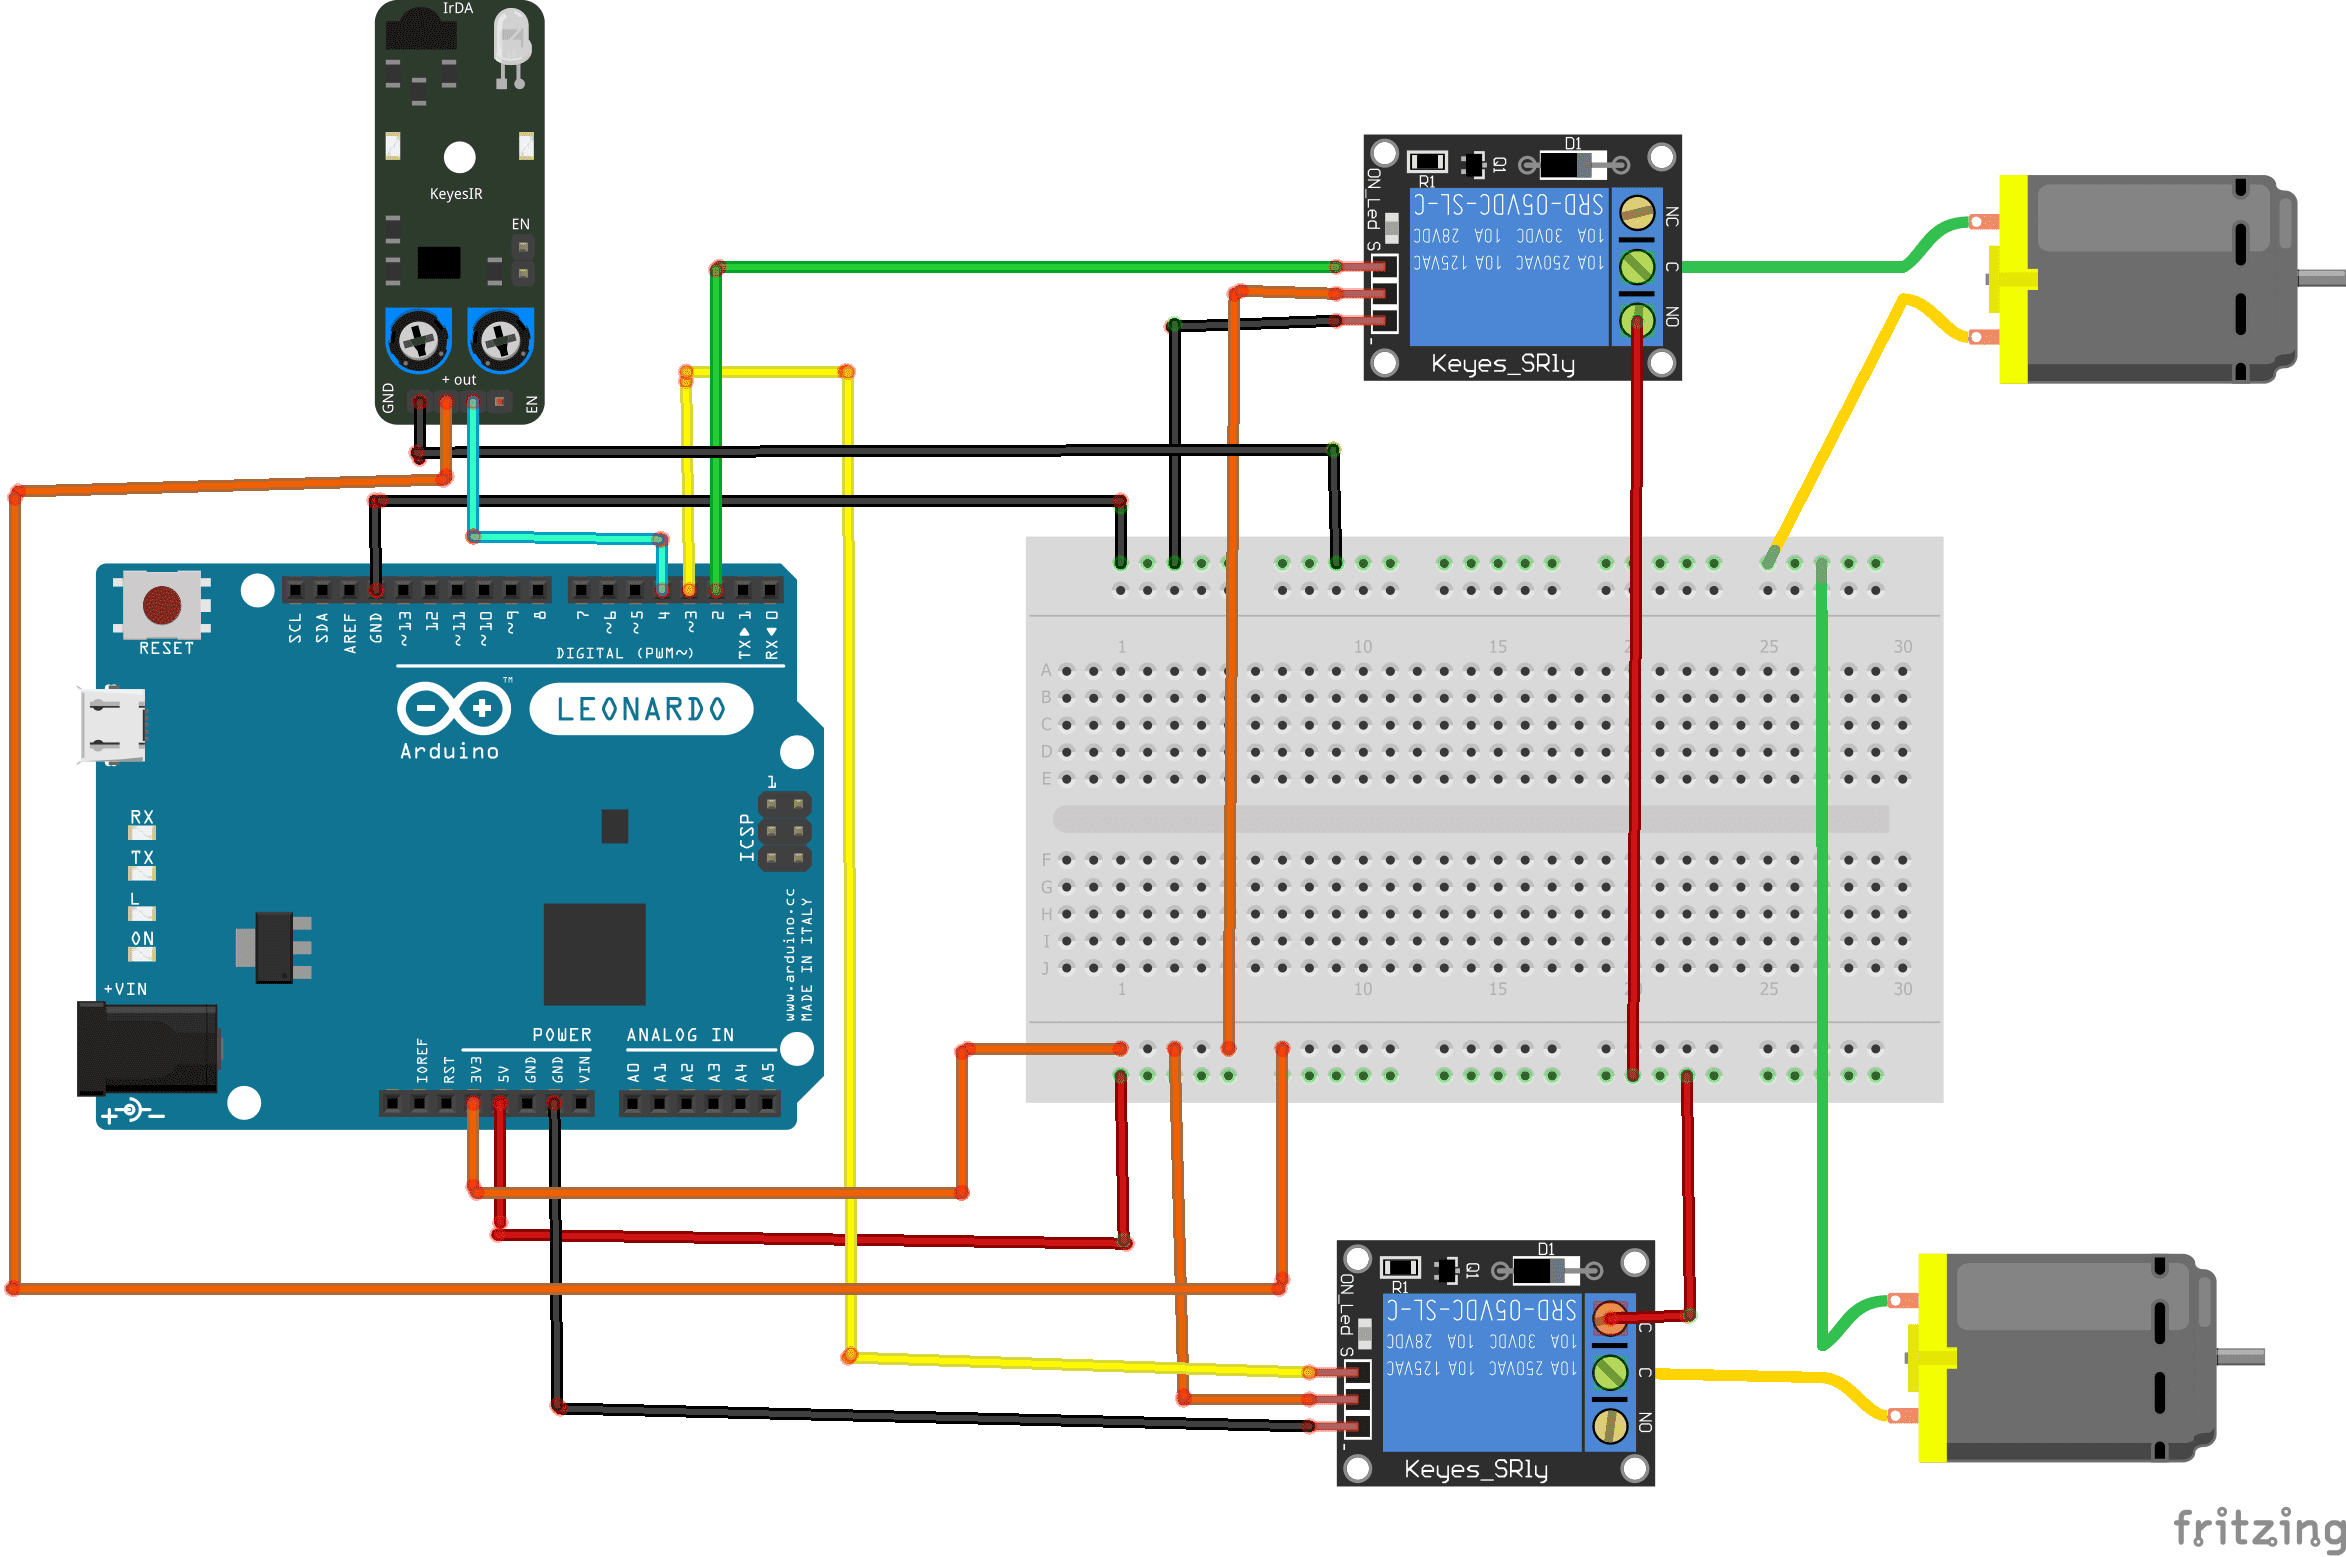
Construction of a remote control car with Arduino
Purpose of this project:
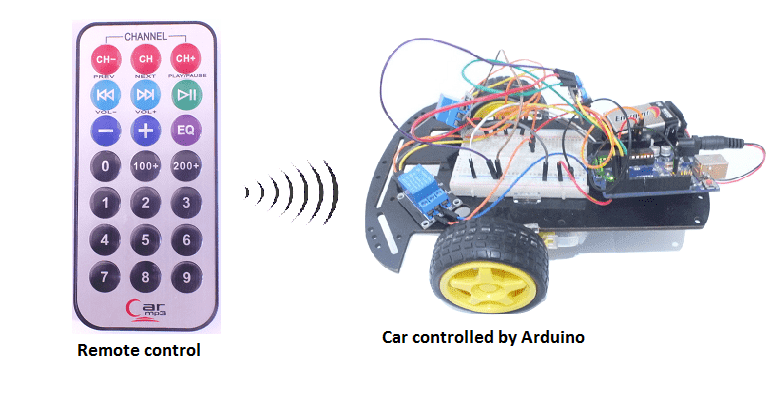
In this project we will build a remotely controlled car (by infrared) controllable by the Arduino board.
The user will be able to drive the car by a remote control in three directions (forward, right and left) and stop it.
necessary components
- Arduino
- Two relays
- Remote control
- IR sensor
- connecting wires
- two wheel
- car chassis
- two DC motor
- one wheel
Construction of the car
Assembly of the car with Arduino
Pour réaliser le montage, on peut connec ter:
For first relay:
- (S) pin to pin 2 of Arduino
- (+) pin to 3.3V pin of Arduino
- (-) pin to GND pin of Arduino
- ON pin to 5V pin of Arduino
For second relay:
- S) pin to pin 3 of Arduino
- (+) pin to 3.3V pin of Arduino
- (-) pin to GND pin of Arduino
- ON pin to 5V pin of Arduino
For each of the two motors:
- first terminal to COM pin of relay
- second terminal to GND pin of Arduino
For IR sensor:
- OUT pin to pin 4 of Arduino
- (+) pin to 3.3V pin of Arduino
- GND pin to GND pin of Arduino
Program
Here is the program for the Arduino connected to the car:
#include
int RECV_PIN = 4;
IRrecv irrecv(RECV_PIN); // IR sensor connected to pin 4 of Arduino
decode_results results;
const int relais_moteur1 = 2; // relay connected to pin 2 of Adruino
const int relais_moteur2 = 3; // // relay connected to pin 3 of Adruino
void setup()
< irrecv.enableIRIn();////Initializes the infrared receiver
pinMode(relais_moteur1, OUTPUT);
pinMode(relais_moteur2, OUTPUT);
>
void loop()
< if (irrecv.decode(&results)) <
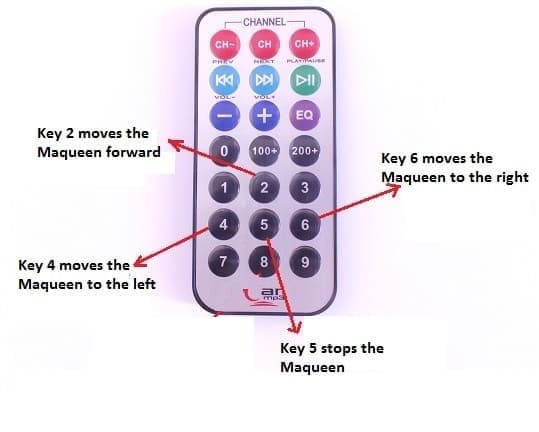
if (results.value==0xFF18E7)//press the 2 key
<
digitalWrite(relais_moteur1, HIGH);// the car is moving forward
digitalWrite(relais_moteur2, HIGH);
>
if (results.value==0xFF5AA5)//press the 6 key
<
digitalWrite(relais_moteur1, HIGH);
digitalWrite(relais_moteur2, LOW); // the car is moving right
>
if (results.value==0xFF10EF)//press the 4 key
<
digitalWrite(relais_moteur1, LOW);
digitalWrite(relais_moteur2, HIGH); //the car is moving left
>
if (results.value==0xFF38C7)// press the 5 key
<
digitalWrite(relais_moteur1, LOW);// car stops
digitalWrite(relais_moteur2, LOW);
>
irrecv.resume(); // Get the following value
>