- Installing the ESP32 Board in Arduino IDE (Mac OS X and Linux instructions)
- Watch the Video Tutorial
- Installing the ESP32 Add-on on Arduino IDE
- 1. Installing the ESP32 Board
- Testing the Installation
- 2. Deleting the espressif folder
- Wrapping Up
- Do you have any questions? Leave a comment below!
- Установка, прошивка платы ESP32 в Arduino IDE (Windows, Mac OS X, Linux)
- Подписывайтесь на наш канал на Youtube и вступайте в группы в Вконтакте и Facebook.
- Всем Пока-Пока. И до встречи в следующей статье.
- Getting Started with ESP32 on a Mac
- Hardware components
- Software apps and online services
Installing the ESP32 Board in Arduino IDE (Mac OS X and Linux instructions)
There’s an add-on for the Arduino IDE that allows you to program the ESP32 using the Arduino IDE and its programming language. In this tutorial we’ll show you how to install the ESP32 board in the Arduino IDE on Mac OS X or Linux. If you’re using a Windows PC follow these instructions instead.
Watch the Video Tutorial
This tutorial is available in video format (watch below) and in written format (continue reading this page).
If you have any problems during the installation procedure, take a look at the ESP32 troubleshooting guide.
If you like the ESP32, enroll in our brand new course: Learn ESP32 with Arduino IDE.
Installing the ESP32 Add-on on Arduino IDE
Important: before starting this installation procedure, make sure you have the latest version of the Arduino IDE installed in your computer. If you don’t, uninstall it and install it again. Otherwise, it may not work. Having the latest Arduino IDE software installed from arduino.cc/en/Main/Software, continue with this tutorial.
IMPORTANT NOTE:
- If this is your first time installing the ESP32 on the Arduino IDE, simply follow the installation procedure described below;
- If you’ve already installed the ESP32 add-on using the old method, you should remove the espressif folder first. Go to the end of this post to learn how to remove the espressif folder.
1. Installing the ESP32 Board
To install the ESP32 board in your Arduino IDE, follow these next instructions:
1) Open the preferences window from the Arduino IDE. Go to Arduino > Preferences
2) Enter https://dl.espressif.com/dl/package_esp32_index.json into the “Additional Board Manager URLs” field as shown in the figure below. Then, click the “OK” button:
Note: if you already have the ESP8266 boards URL, you can separate the URLs with a comma as follows:
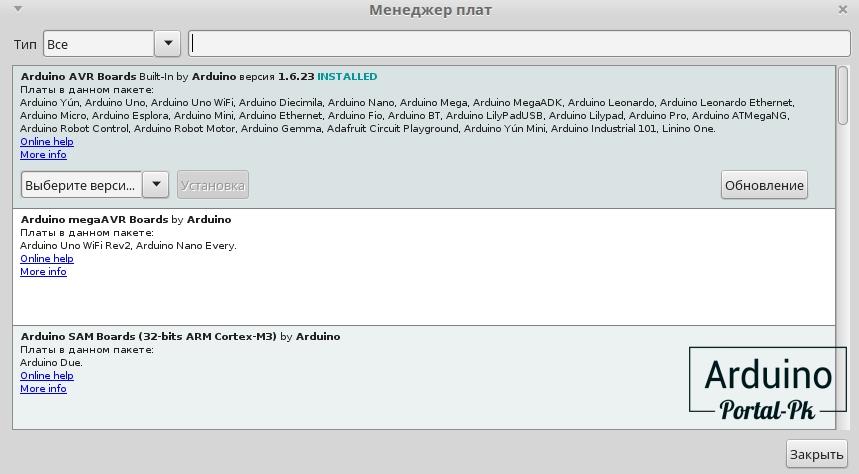
3) Open boards manager. Go to Tools > Board > Boards Manager…
4) Search for ESP32 and press install button for the “ESP32 by Espressif Systems“:
5) That’s it. It should be installed after a few seconds:
Testing the Installation
Plug the ESP32 board to your computer. Then, follow these steps:
1) Open the Arduino IDE
2) Select your Board in Tools > Board menu (in my case it’s the DOIT ESP32 DEVKIT V1)
3) Select the Port (if you don’t see the COM Port in your Arduino IDE, you need to install the ESP32 CP210x USB to UART Bridge VCP Drivers):
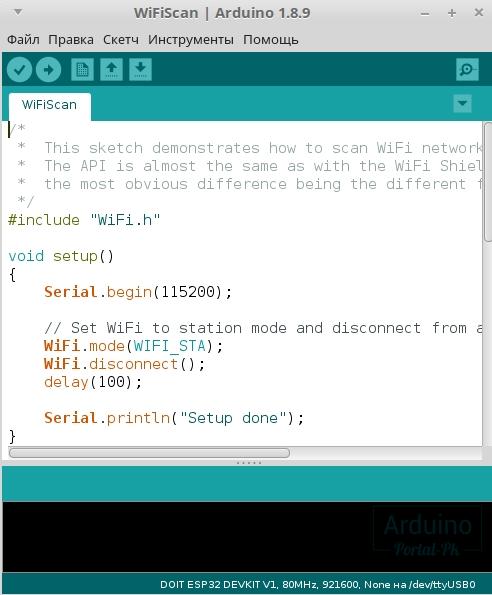
4) Open the following example under File > Examples > WiFi (ESP32) > WiFi Scan
5) A new sketch opens:
6) Press the Upload button in the Arduino IDE. Wait a few seconds while the code compiles and uploads to your board.
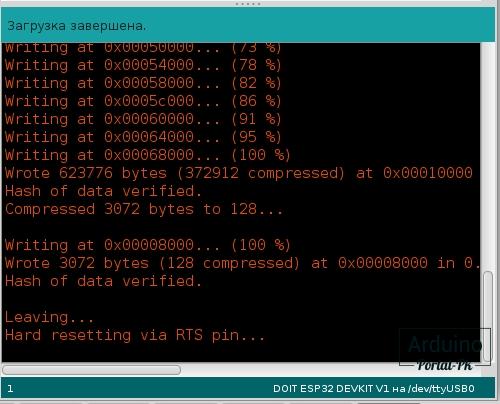
7) If everything went as expected, you should see a “Done uploading.” message.
8) Open the Arduino IDE Serial Monitor at a baud rate of 115200:
9) Press the ESP32 on-board Enable button and you should see the networks available near your ESP32:
This is a very basic tutorial that illustrates how to prepare your Arduino IDE for the ESP32 on your computer.
2. Deleting the espressif folder
If this is your first time installing the ESP32 on Arduino IDE you can ignore this section.
If you’ve followed the older installation procedure and you’ve manually installed the ESP32 add-on with Git GUI, you need to remove the espressif folder from your Arduino IDE.
To find your espressif folder and Arduino IDE location (installation path), open your Arduino IDE and go to Arduino > Preferences:
Copy the location from the “Sketchbook location” field:
Go to your Arduino IDE location directory: /Users/Rui/Documents/Arduino, open the hardware folder, and delete the espressif folder.
Wrapping Up
This is a very basic tutorial that illustrates how to prepare your Arduino IDE for the ESP32 on a Mac or a Linux PC. We took those screenshots using Mac OS X, but a very similar procedure is done for Linux.
You might also like reading:
Do you have any questions? Leave a comment below!
Thanks for reading. If you like this post probably you might like my next ones, so please support me by subscribing my blog and my Facebook Page.
Установка, прошивка платы ESP32 в Arduino IDE (Windows, Mac OS X, Linux)
Существует надстройка для Arduino IDE, которая позволяет программировать ESP32 с использованием Arduino IDE и его языка программирования. В этой статье мы покажем вам, как установить плату ESP32 в Arduino IDE, не зависимо от используемой вами операционной системы: Windows, Mac OS X или Linux.
Если у вас возникли какие-либо проблемы во время процедуры установки, сообщите об этом на форуме.
Необходимые условия: Arduino IDE последней версии.
Перед началом установки убедитесь,что на вашем компьютере установлена последняя версия Arduino IDE. Если у вас стоит не последняя версия, сперва удалите текущую версию и затем установите более новую версию. В противном случае, данная инструкция может не сработать.
Имея последнюю версию Arduino IDE, установленную с официального сайта, продолжайте установку по данной инструкции.
Установка дополнения ESP32 в Arduino IDE
Чтобы установить плату ESP32 в Arduino IDE, выполните следующие действия:
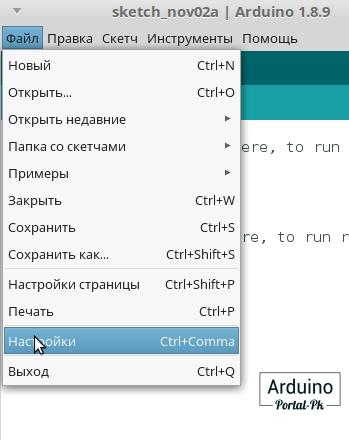
1. В вашем Arduino IDE перейдите в Файл> Настройки
2. Войдите https://dl.espressif.com/dl/package_esp32_index.json. в поле «Дополнительные ссылки для менеджера платы», как показано на рисунке ниже. Затем нажмите кнопку OK.
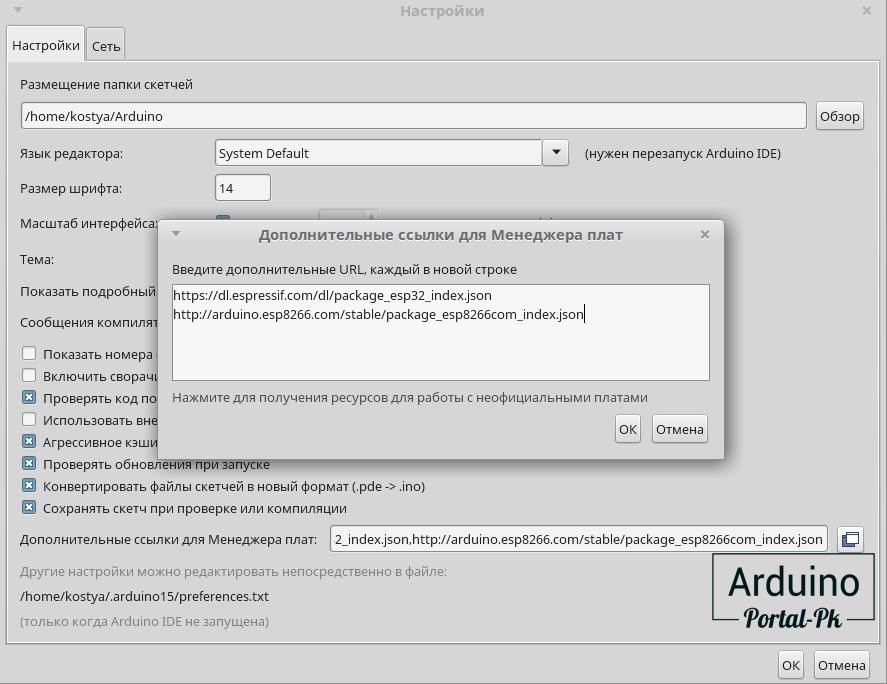
Внимание: Если вы у вас установлена в Arduino IDE ESP8266 то добавьте 2 строки или через запятую:
3. Откройте Менеджер плат. Перейдите в меню Инструменты > Платы > Менеджер плат
4. Ищем ESP32. И нажимаем кнопку Установка.
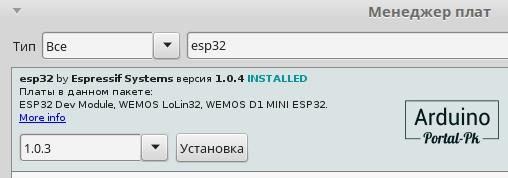
5. Вот и все. Через пару минут у вас все установиться.
Первая загрузка скетча в ESP32.
Подключите плату ESP32 к компьютеру. Открываем Arduino IDE и выполним следующие действия:
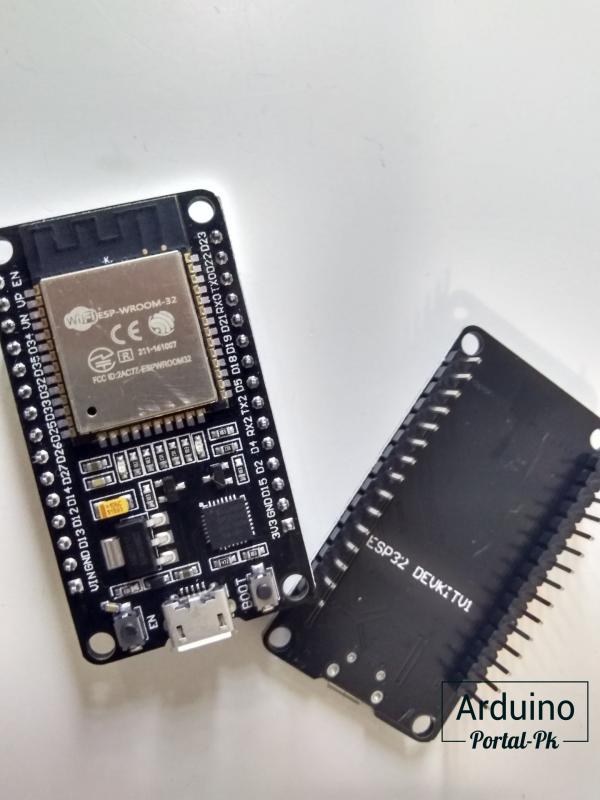
1. Выберите доску в меню Инструменты > Плата (в моем случае это DOIT ESP32 DEVKIT V1 )

Плата (в моем случае это DOIT ESP32 DEVKIT V1)» width=»382″ height=»240″ style=»display: block; margin: auto; width: 382px; height: 240px;» rel=»display: block; margin: auto; width: 382px; height: 240px;»>
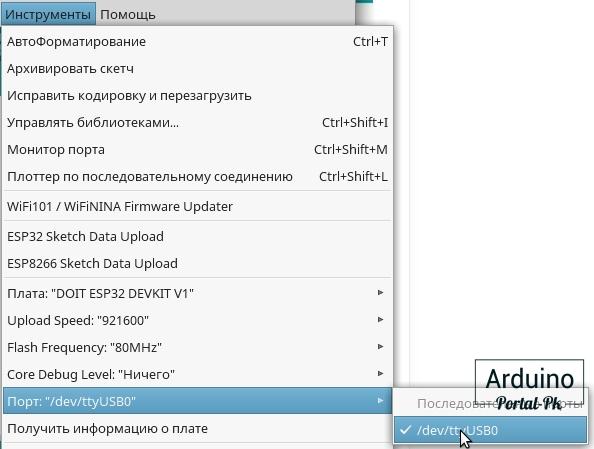
2. Выберите порт (если вы не видите COM-порт в Arduino IDE, вам необходимо установить драйверы CP210x USB to UART Bridge VCP). В моем случае ком порт отображается по другому. Это связанно с тем что я использую OS Linux.
3. Открыть в следующем примере в Файл > Примеры > WiFi > WiFiScan
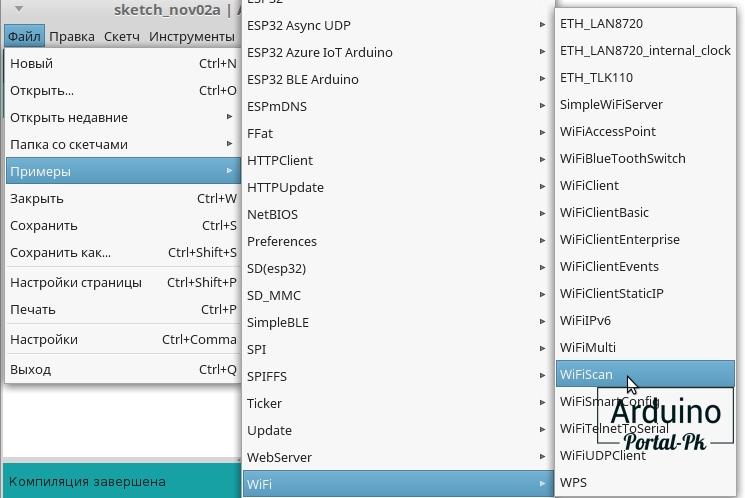
4. В вашей среде Arduino IDE откроется новый скетч.
5. Нажмите кнопку Загрузить в Arduino IDE. Подождите несколько секунд, пока код компилируется и загружается на вашу плату.
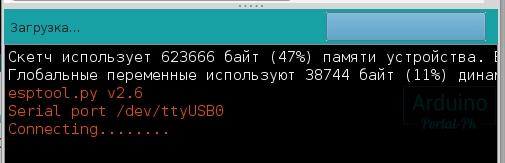
Внимание! Если у вас бежит строка с повторяющимися точками и линиями. Нажмите кнопку Boot на плате и удерживайте ее пока не побегут проценты загрузки. После чего кнопку можно отпустить.
6. Откройте последовательный монитор Arduino IDE со скоростью передачи данных 115200.
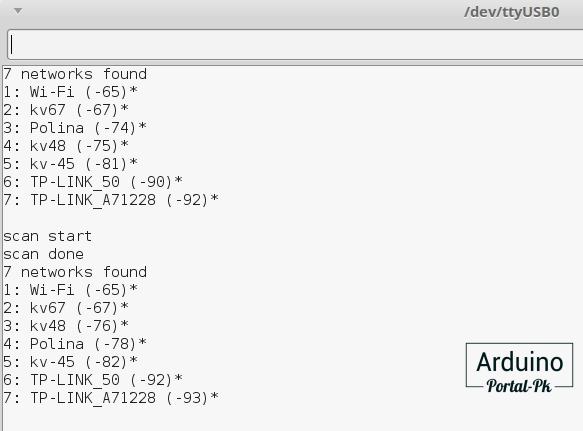
7. Нажмите кнопку EN на борту ESP32 , и вы увидите список сетей, доступных для вашей ESP32.
Подведение итогов.
Это краткое руководство, которое иллюстрирует, как подготовить ваш Arduino IDE для ESP32 на компьютере с ОС Windows, Mac OS X или Linux. Если во время установки возникнут какие-либо проблемы, пишите на форум.
Теперь вы можете начать создавать свои собственные проекты IoT с ESP32.
Подписывайтесь на наш канал на Youtube и вступайте в группы в Вконтакте и Facebook.
Всем Пока-Пока. И до встречи в следующей статье.
Понравилась статья? Поделитесь ею с друзьями:
Getting Started with ESP32 on a Mac
ESP32 is a low-cost and low power system on a chip microcontroller with integrated Wi-Fi and dual-mode Bluetooth.

Hardware components
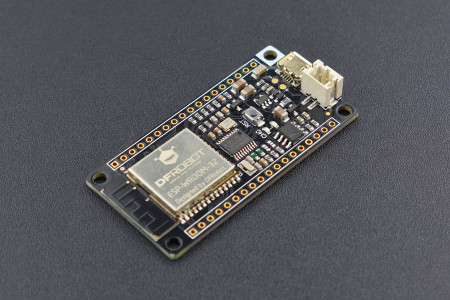
| DFRobot FireBeetle ESP32 IOT Microcontroller (Supports Wi-Fi & Bluetooth) |

| USB-A to Micro-USB Cable |
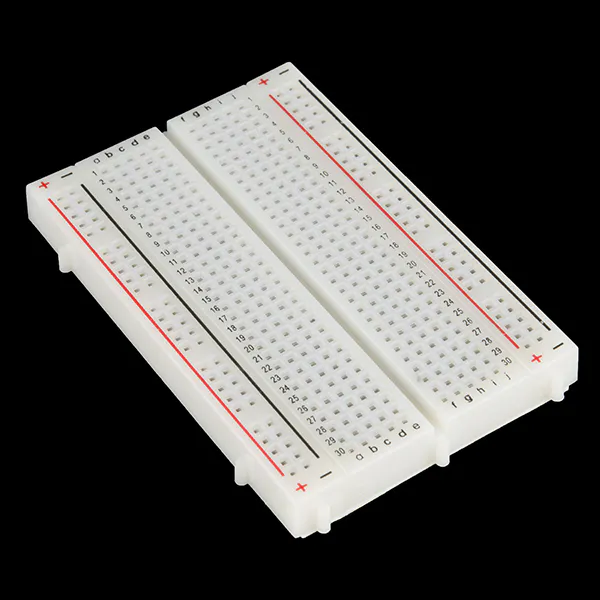
| Breadboard (generic) |
Software apps and online services

| Arduino IDE |
ESP32 is created and developed by Espressif Systems, a Shanghai-based Chinese company, and is manufactured by TSMC using their 40nm process.
ESP32 includes the following features:
- Dual core Xtensa microprocessor (LX6), running at 160 or 240MHz
- 520KB of SRAM
- 802.11b/g/n/e/i
- Bluetooth v4.2 BR/EDR and BLE
- 12-bit ADC with up to 18 channels
- 2x 8-bit DACs
- 10x touch sensors
- Temperature sensor
- 4x SPI
- 2x I2S
- 2x I2C
- 3x UART
- SD/SDIO/MMC host
- Slave (SDIO/SPI)
- Ethernet MAC
- CAN bus 2.0
- IR (RX/TX)
- Motor PWM
- LED PWM with up to 16 channels
- Hall effect sensor
- Cryptographic hardware acceleration (RNG, ECC, RSA, SHA-2, AES)
- 5uA deep sleep current
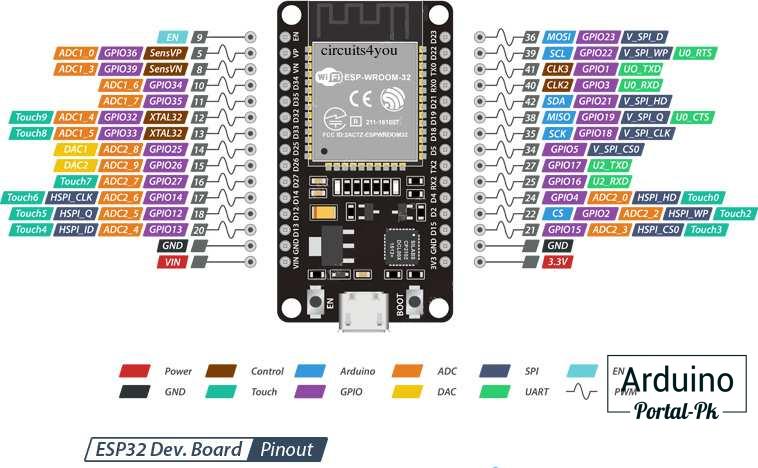
ESP32 Development Board will be used to blink an embedded LED infinitely.
- ESP32 Module
- Arduino IDE
- Programming cable (micro USB cable)
- Breadboard (optional)
How to connect your ESP32 to a MacBook
- Install the driver in order to communicate UART through USB.
- Go to Preferences/Security & Privacy and allow the driver to run, and restart the Mac.
- Connect your Micro USB to your ESP32 Board.
- Run $ ls /dev/cu.* and you should now see /dev/cu.SLAB_USBtoUART.
Before starting the next step make sure you have the latest version of the Arduino IDE installed in your computer. It can be found by the following link .
Installing ESP32 Add-on in Arduino IDE
- In your Arduino IDE, go to File > Preferences
- Enter https://dl.espressif.com/dl/package_esp32_index.json into the “Additional Board Manager URLs” field. Then, click the “OK” button.
- Go to Tools > Board > Boards Manage.
- Search for ESP32 and press install button for the “ ESP32 by Espressif Systems “.
- Close a window
Blinking a built-in LED on ESP32
Plug the ESP32 board to your computer. Open Arduino IDE, follow these steps:
- Select your Board in Tools > Board menu (in my case it’s the ESP32 DevModule )