Счетчики. Вариант 1 — Простейший счетчик на базе Arduino
Опубликовано: 01.06.2017 19:27
Всем привет, в этой статье мы рассмотрим создание прототипа простейшего счетчика импульсов. Для создания прототипа нам потребуется следующее оборудование:
- Плата Arduino Nano, либо Uno, в общем то подойдёт любая плата семейства Arduino
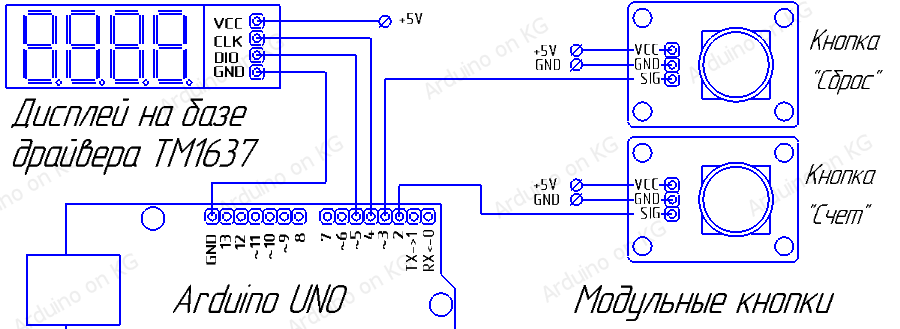
- Две тактовые кнопки, в нашем прототипе мы используем готовые модули кнопок
- 7-ми сегментный дисплей на базе драйвера TM1637
- Корректная библиотека для дисплеев на базе драйвера TM1637. Скачать можно по ссылке.
- Набор проводов с разъёмом Dupont(Тип окончания Папа-Папа)
- Ну и конечно же желание, куда же без него.
Вот фото всего того что нам понадобится, плата Arduino Nano установлена на отладочный шилд I/O Wireless Shield for Nano:

Соединяем провода согласно нижеприведённой схеме:
Если вдруг у вас нет модулей кнопок, то можно решить эту задачу согласно следующей схеме:
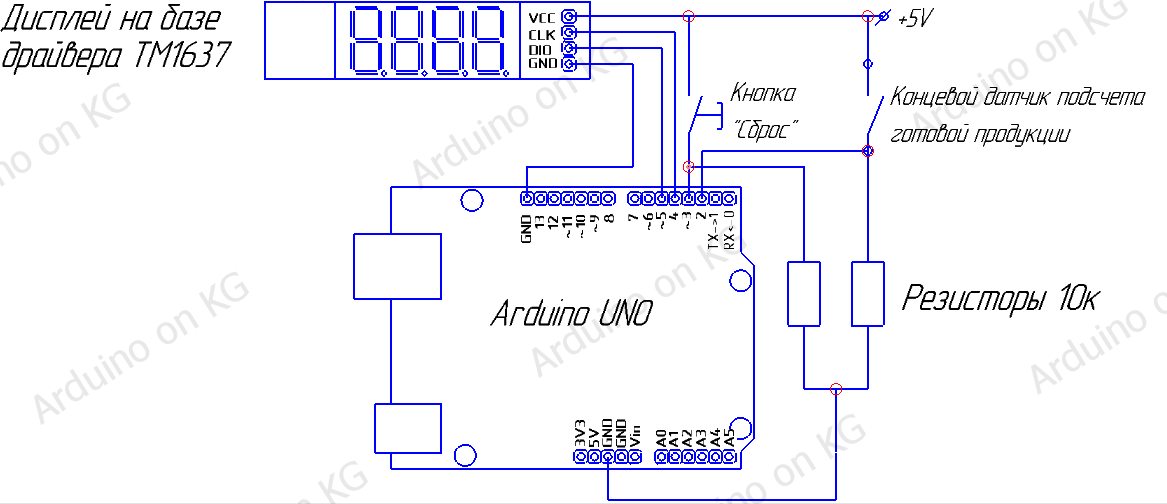
Это тоже самое что и предыдущий чертеж, только модули кнопок здесь как бы разнесены на свои принципиальные схемы.
После того как все провода соединены, остаётся только загрузить скетч в контроллер, и испытать полученный прототип. Скетч выложен ниже, его можно просто скопировать в свой проект на Arduino IDE, но прежде всего, чтобы всё правильно откомпилировалось, нужно установить библиотеку для дисплеев на базе драйвера TM1637.
Как работает прототип счетчика? Всё в общем то просто — зеленая кнопка имитирует событие, к примеру проход изделия по конвейеру, сигнал с кнопки считывается программой и далее происходит инкремент значения счетчика. Красная кнопка служит для сброса значения счетчика в ноль. Также в программе реализована функция обработки дребезга контактов кнопки(либо концевого датчика), чтобы избежать ложных подсчетов импульсов. Вместо кнопки имитации импульсов можно использовать любой из концевых датчиков, например вот такие:
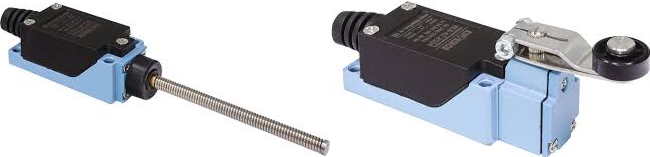
но, при этом предварительно подтянув порт подключения датчика к земле. Из плат можно использовать любую доступную, будь то UNO, Mega, и даже такого малыша как Digispark ATTiny85. На этом в общем то и всё, в конце хотелось представить вам обзорное видео по статье:
12 counter projects
![]()
Race controller for slot car or drone racing with dedicated racer gates. Cheap, portable, accurate, and easy to build.
Arduino Race Timer, Lap Counter, and Controller
Project tutorial by Michael Baycura
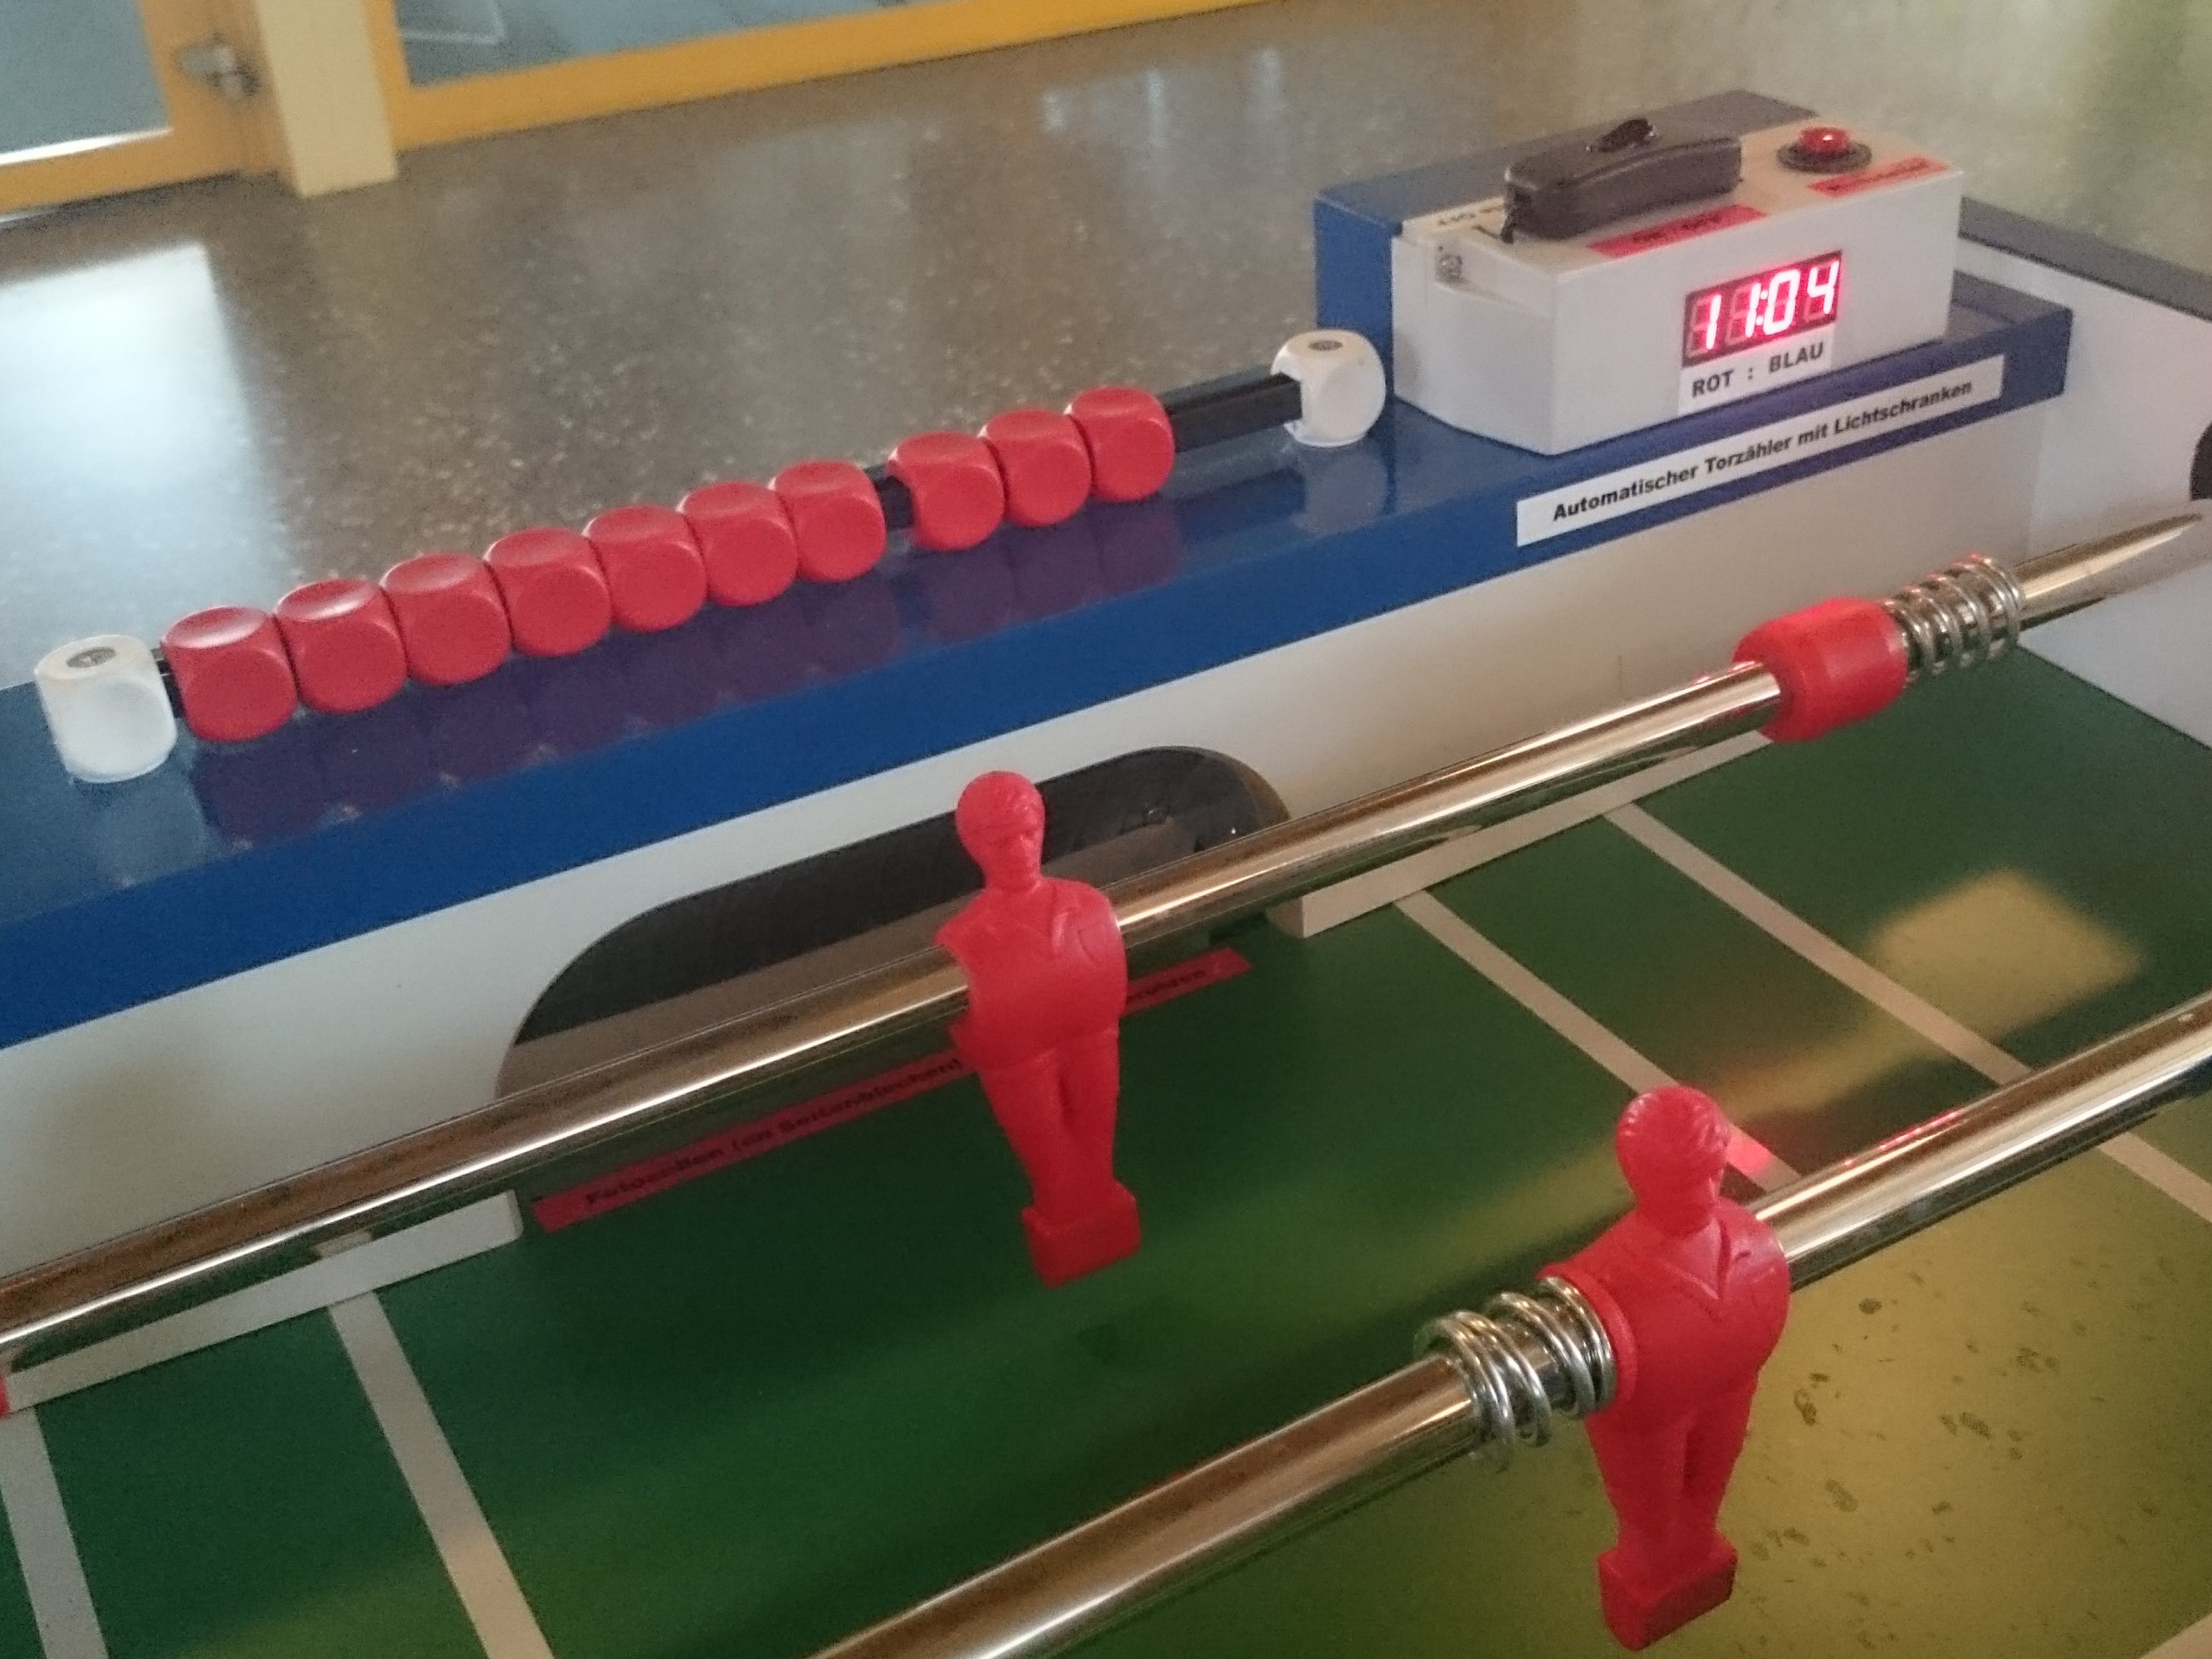
With photocells in both goals and a bright LED-display on the table, a USB powerbank provides action for at least 30 hours.
Automatic Arduino Goal Counter for Table Football/Soccer
Project showcase by OSZ Täuffelen
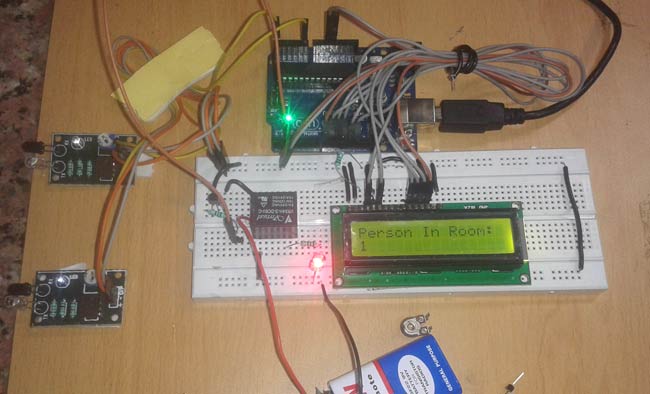
When at least one person enters the room, the light and fan turn ON. When everyone exits the room, the light turns OFF.
Automatic Room Light Controller with Bidirectional Visitor

For 3D makers the worst thing is running out filament in the middle of a hours long print. This device will order for you when it is low!
Smart 3D Printer Filament Counter (FilamentBot)
Project tutorial by ArtSuzhou
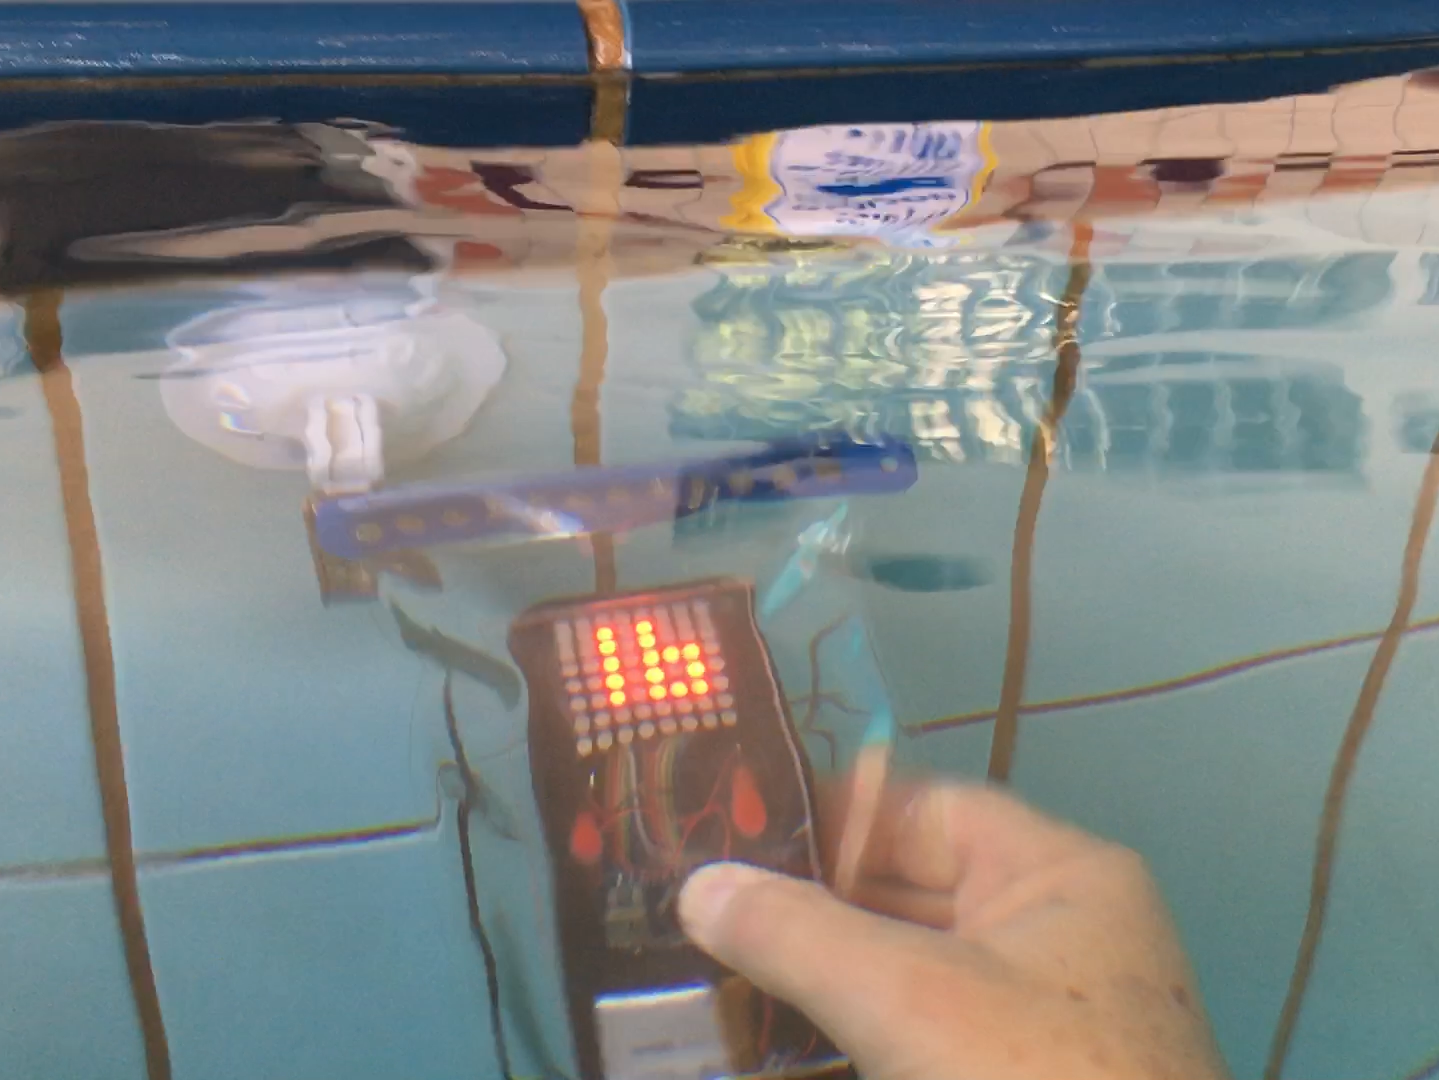
It is a rechargeable waterproof lap counter that does not use a water proof bag separately.
Simple Lap Counter for Swimming Maniac (Waterproof)
Project tutorial by Oscar Seo
![]()
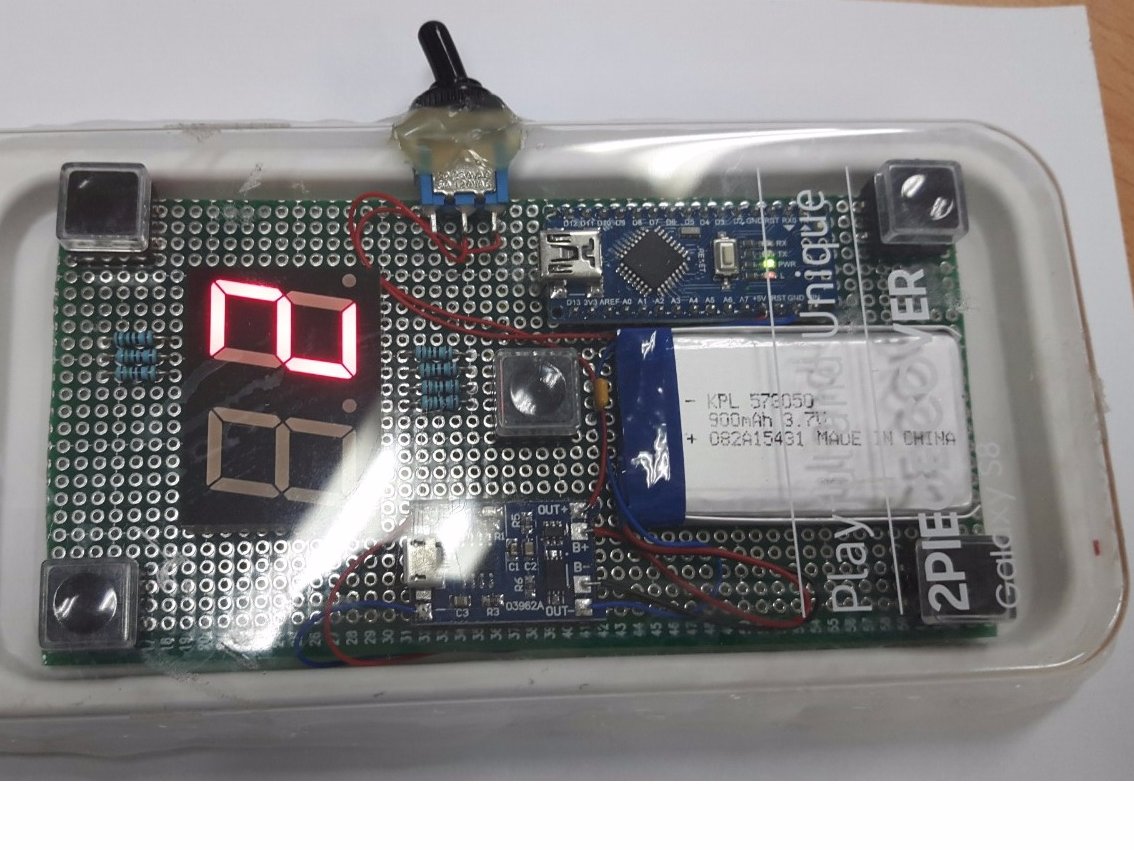
A large 4-digit 7-segment counter with LiPo backup, in case USB power is cut.
4-Digit 7-Segment Counter with LiPo Backup
Project showcase by Ratti3
I love swimming, but I tend to lose count of the laps, so I made this lap counter with an Arduino.
Geiger Counter with Arduino Uno © CC BY-NC-SA
In this tutorial you will learn how to assemble and use a nuclear radiation detector.
In this tutorial you will learn how to assemble and use a nuclear radiation detector.
You can purchase the Geiger Counter Kit here.
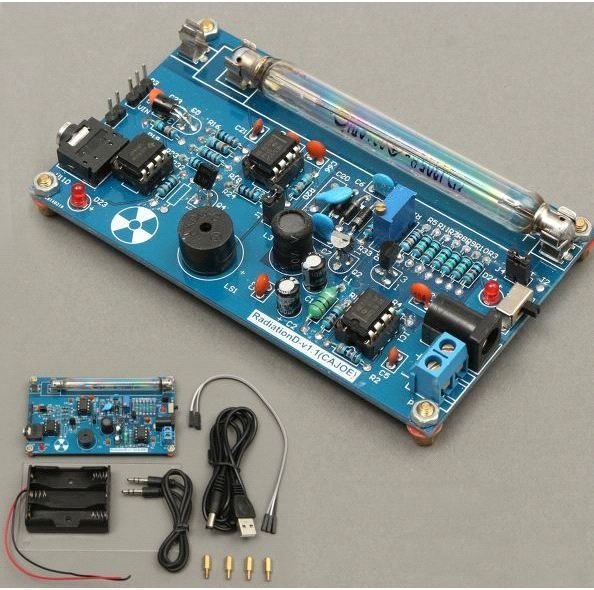
A Geiger counter is an instrument used for detecting and measuring ionizing radiation. Also known as a Geiger–Mueller counter (or Geiger–Müller counter), it is widely used in applications such as radiation dosimetry, radiological protection, experimental physics, and the nuclear industry.
Geiger counters are used to detect radioactive emissions, most commonly beta particles and gamma rays. The counter consists of a tube filled with an inert gas that becomes conductive of electricity when it is impacted by a high-energy particle.
1 x Radiation Detector system Kit
1 x Power supply cable
1 x Battery Holder
3 x Jumper Wires
1 x Acrylic cover
— Name:Radiation Detector system
Geiger tube parameters
Geiger counter at work (copy the following link to the browser to watch): Http://v.youku.com/v_show/id_XNzI3MTU2NzQ0.html
Step 1: Soldering the Geiger Counter
This is a timelapse of the assembly process of the geiger counter.
Step 2: Using the Geiger Counter With an Arduino
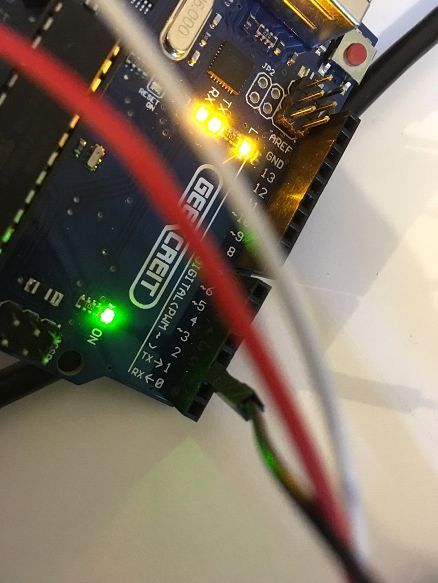
Connect P3 GND, 5V, VIN to Arduino GND, 5V, Digital 2 respectively.
Then in the arduino IDE software open the file: spi_rad_logger.ino which you could find
Be sure to change the Serial.print(cpm) command to Serial.println(cpm) in the void loop()<> for better readability.
Upload the program onto the board. Once upload is completed, open the serial port window by clicking on the scope on the upper right corner.
Then we’ll get the radiation value displayed in CPM, counter per minutes which could be converted to uSv/h with the index 151(151CPM=1uSv/h for M4011 GM Tube).
_5wcoA9Usuu.jpg)
This tutorial has been produced as part of the DEEDU project, co-financed by the Erasmus + Programme of the European commission. Project n°: 2018-1-FR02-KA205-014144.
Counter with Arduino
Counter in Arduino
A counter is a display device that can be used to display different timings using various kinds of display modules such as seven-segment-displays. Counters are used in various fields such as clocks, stopwatches, timers, etc.
There are different types of times that are used such as count up timer, count down timer, etc. Timers are used to carry out
Application of Counters :
Counters have a variety of application in various fields of electrical technology applications. Some of them are:
- Digital Clock
- Digital Step watches
- Digital timer and sports timer.
- Media Players.
- Washing Machines
- etc.
Counters in Arduino
The practical uses of counters can only be seen when connected with digital circuits which has timing properties inside it. The simplest timer IC available in the market is the 555 timer IC. But, these types of ICs cannot be programmed and cannot be customized and thus have remained obsolete for many years.
The best possible way to implement timers or counters is by interfacing the display module into the Arduino.
Components Required :
- Arduino UNO Board.
- Bread Board.
- Jumper Wires.
- Seven Segment Display Module. (4 digit size)
Connecting the LED module into the Arduino
Now edit the following code into the Arduino Editor:
eesur/arduino-counter-with-display
Use Git or checkout with SVN using the web URL.
Work fast with our official CLI. Learn more.
Launching GitHub Desktop
If nothing happens, download GitHub Desktop and try again.
Launching GitHub Desktop
If nothing happens, download GitHub Desktop and try again.
Launching Xcode
If nothing happens, download Xcode and try again.
Launching Visual Studio Code
Your codespace will open once ready.
There was a problem preparing your codespace, please try again.
Latest commit
Git stats
Files
Failed to load latest commit information.
README.md
# Arduino Counter with 7 segment display
01 Arduino counter using switch
Simple counter that shows on 7 segment display and serial monitor

Based off these two tutorials:
02 Arduino counter using PIR sensor
Using a PIR sensor to count motion events. Displays the counts on the 7 segment display and details in serial monitor.
It pauses for 1 second (can change ‘pause’ in code) to ensure motion has ended, before entering into ‘off’ state and intern detect the next motion.

Based off these two tutorials:
03 Arduino counter using infrared sensor
Using Infrared Sensor (Sharp GP2Y0A02YK0F) to count passing motion. Displays the counts on the 7 segment display and details in serial monitor.

Requires these libraries (just for the Adafruit backpack display):
About
Simple counter that shows on 7 segment display and serial monitor