Arduino + OLED + Encoder Simple Menu System
Easy way to control variables with one rotary encoder and OLED display.
Hardware components
_ztBMuBhMHo.jpg)
| Arduino UNO |
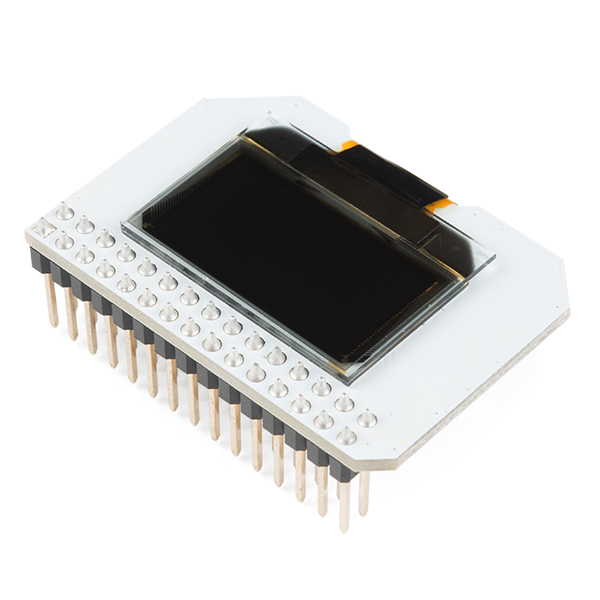
| Onion Corporation OLED Expansion |
| or different one. |

| Rotary Encoder with Push-Button |
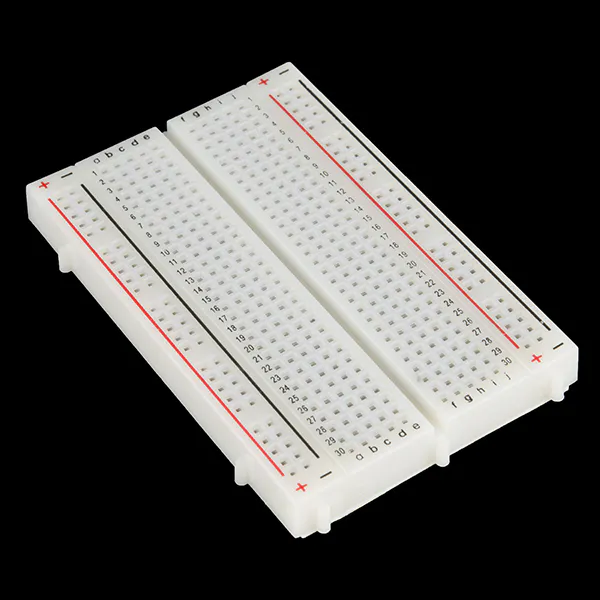
| Breadboard (generic) |
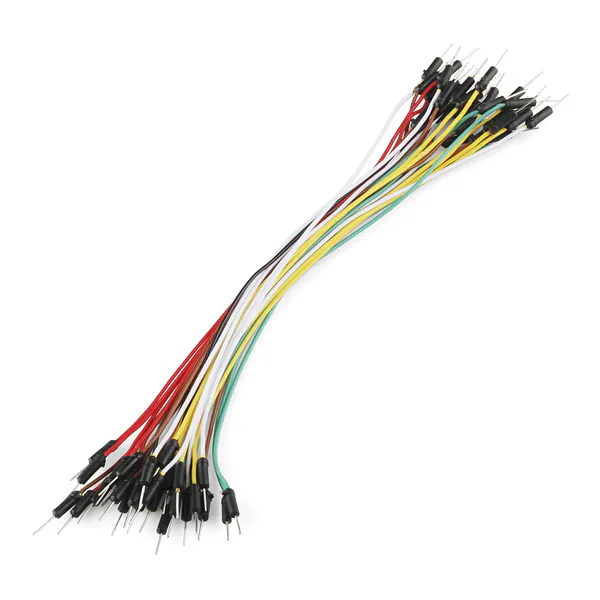
| Jumper wires (generic) |
It started with simple camera slider project.I decided to add two buttons and three pot on my project.
That was easy and useful but I prefer less component, simple looking so I decided to control my unit with screen.
. and yyRobotics comes here! (That’s my name ‘Yılmaz Yurdakul’).
Now, it is controlling 3 variable attached to analog outputs.
wiring is really simple. SDA, SCL, two pins for encoder, one pin for built in button.
This function controls turn count and menu controller transfers this count to variable. When user clicks the button, counter resets to 0. Also there is more simple and better way to control variables. You can use direction variable(dir).
After all, i decided to upgrade. I did so much improvisation because now i am working on midi controller project. I just completed controlling part. Here is the code. More stable, more effective.
I built new project. You can grab new menu codes from this project.
shadicode/Arduino_OLED_UI
Use Git or checkout with SVN using the web URL.
Work fast with our official CLI. Learn more.
Launching GitHub Desktop
If nothing happens, download GitHub Desktop and try again.
Launching GitHub Desktop
If nothing happens, download GitHub Desktop and try again.
Launching Xcode
If nothing happens, download Xcode and try again.
Launching Visual Studio Code
Your codespace will open once ready.
There was a problem preparing your codespace, please try again.
Latest commit
Git stats
Files
Failed to load latest commit information.
README.md
Arduino Menu/UI using OLED & Rotary Encoder
White 0.96″ I2C 128X64 OLED LCD Display Module : eBay (gc_supermarket) for 6.46 USD 3V — 5V DC, Ultra low power consumption (Max: 0.08W), Resolution: 128*64, Viewing angle: >160º, No Backlight, i2c communication, Driver IC: SSD1306 (Datasheet)
Download the Adafruit_SSD1306 Arduino library This is a library for Adafruit Monochrome OLEDs based on SSD1306 drivers
- Adafruit_SSD1306.h #define SSD1306_I2C_ADDRESS 0x3C // 011110+SA0+RW — 0x3C or 0x3D // Address for 128×32 is 0x3C // Address for 128×64 is 0x3D (default) or 0x3C (if SA0 is grounded)
Download Adafruit GFX Library (Graphics library) This is the core graphics library for all Adafruit displays, providing a common set of graphics primitives (points, lines, circles, etc.).
Rotary Encoder Module (KY-040)
About
Arduino Menu/UI using OLED & Rotary Encoder
alanesq/BasicOLEDMenu
Use Git or checkout with SVN using the web URL.
Work fast with our official CLI. Learn more.
Launching GitHub Desktop
If nothing happens, download GitHub Desktop and try again.
Launching GitHub Desktop
If nothing happens, download GitHub Desktop and try again.
Launching Xcode
If nothing happens, download Xcode and try again.
Launching Visual Studio Code
Your codespace will open once ready.
There was a problem preparing your codespace, please try again.
Latest commit
Git stats
Files
Failed to load latest commit information.
README.md
Basic OLED with rotary encoder Menu for ESP8266/ESP32/Probably others
Note: This is a completely different sketch as of Nov21 as I decided to start again and create a version which is none blocking.
The old version oldVersion.ino is easier to use but will stop everything else whilst waiting for user input etc.
A simple to use, cheap to build and simple to wire menu system using a small oled display and a rotary encoder. I created it so I can quickly and easily add an oLed menu to any new projects, as you can see it only requires 5 wires (plus power).
Uses libraries: Adafruit_SSD1306 and Adafruit_GFX_Library
It gives basic menus, the ability to enter a numerical value or choose from a list.
The sketch uses the cheap 128×64 oled displays but the settings can be changed to work with different size displays.
I am very impressed with these displays, they are cheap, easy to use and despite being small they are still easy to read.
Note: I have seen reports of them being easily damaged by static and I have had one fail which could have been for this reason, I think it best to be careful of this when using one on a breadboard etc, they seem ok once installed in a project.
If you have any poor connections (especially to the rotary encoder) this can result in garbage being displayed which can make you think there is a fault with the display.
If you are new to the esp8266 using one of these OLED displays would be a very good project for you to try.
earch ebay for «SSD1306 i2c» and you should be able to pick up an oled display like the one in the picture above for around £3. Search for «ky-040» for a rotary encoder for around £1.
BTW — I have incorporated all this in to my basicWebserver starting point sketch which may be of interest: https://github.com/alanesq/BasicWebserver
Even if you do not use BasicWebserver, this version may be easier to include in your own projects as you just have to include oled.h and add a single line to your setup and loop.
Note: I had a lot of trouble finding some code which would work reliably with a rotary encoder (i.e. the interupt section) but find this to be very good although this may not be the case with all encoders?
See these videos for more info: https://www.youtube.com/watch?v=b2uUYiGrS5Y
If you have a cnc router there is a Fritzing file in the MISC folder I use for making PCBs which may be of interest. It is in a format which is very basic but it allows me to modify it and create a PCB as quickly as possible. 
Arduino OLED Display Menu With Option to Select © GPL3+
In this tutorial we will learn how to make a menu with a selection option using OLED Display and Visuino.
In this tutorial we will learn how to make a menu with a selection option using OLED Display and Visuino.
Watch the video.
- Arduino UNO (or any other Arduino)
- Jumper wires
- OLED Display
- Breadboard
- 1K ohm resistor
- Button
- Visuino program: Download Visuino
- Connect OLED display pin [VCC] to arduino pin [5V]
- Connect OLED display pin [GND] to arduino pin [GND]
- Connect OLED display pin [SDA] to arduino pin [SDA]
- Connect OLED display pin [SCL] to arduino pin [SCL]
- Connect Arduino 5V to one side of the resistor
- Connect other side of the resistor to the button
- Connect other side of the button to the Arduino digital pin[8] and to the ground
To start programming the Arduino, you will need to have the Arduino IDE installed from here: https://www.arduino.cc/.
Please be aware that there are some critical bugs in Arduino IDE 1.6.6. Make sure that you install 1.6.7 or higher, otherwise this tutorial will not work! If you have not done follow the steps in this tutorial to setup the Arduino IDE to program Arduino UNO! The Visuino: https://www.visuino.eu also needs to be installed. Start Visuino as shown in the first picture Click on the «Tools» button on the Arduino component (Picture 1) in Visuino When the dialog appears, select «Arduino UNO» as shown on Picture 2
- Add «Counter» component
- Add «Integer Array» component
- Add «Integer Multi Source» component
- Add «SSD1306/SH1106 OLED Display (I2C)» component
- Select «Counter1» component and in the properties window set ‘Max’>’Value’ to 2 and ‘Min>’Value’ to 0
- Double click on «Array1» and in the Elements window drag 3x ‘Value’ to the left sideSelect Item[1] and in the properties window set value to 20Select Item[2] and in the properties window set value to 40
- Select «IntegerMultiSource1» component and in the properties window set ‘Output Pins’ to 4
- Double click on «DisplayOLED1» and in the elements window -drag 3X «Draw Text» to the leftSelect ‘Draw Text1’ and in the properties window set color to tmcInvert, size to 2, text to ‘Menu-1’Select ‘Draw Text2’ and in the properties window set color to tmcInvert, size to 2, text to ‘Menu-2’, Y to 20Select ‘Draw Text3’ and in the properties window set color to tmcInvert, size to 2, text to ‘Menu-3’, Y to 40-drag «Draw Rectangle» to the left and set color to tmcWhite and fillcolor to tmcWhite, height to 20, Width to 128, select Y and click on the Pin icon and select ‘Integer SinkPin’-drag «Fill Screen» to the left
- Connect Arduino digital pin[8] to «counter1» component pin[In]
- Connect «Counter1» component pin[out] to «Array1» pin[Index]
- Connect «Array1» component pin[out] to «IntegerMultiSource1» pin[In]
- Connect «IntegerMultiSource1» pin[0] to DisplayOLED1>Fill Screen1 pin[clock]
- Connect «IntegerMultiSource1» pin[1] to DisplayOLED1>Draw Rectangle1 pin[Y]
- Connect «IntegerMultiSource1» pin[2] to DisplayOLED1>Draw Rectangle1 pin[Clock]
- Connect «IntegerMultiSource1» pin[3] to DisplayOLED1>Draw Text1 pin[Clock]
- Connect «IntegerMultiSource1» pin[3] to DisplayOLED1>Draw Text2 pin[Clock]
- Connect «IntegerMultiSource1» pin[3] to DisplayOLED1>Draw Text3 pin[Clock]
- Connect «DisplayOLED1» pin I2C[Out] to Arduino board I2c pin[In]
In Visuino, at the bottom click on the «Build» Tab, make sure the correct port is selected, then click on the «Compile/Build and Upload» button.
If you power the Arduino UNO module, and the OLED display should start displaying the menu, you can navigate through the menu by pressing on the button.
Про Ардуино и не только
четверг, 4 января 2018 г.
Текстовое меню на Ардуино

- Клон Arduino UNO;
- I2C дисплей 20×4. Для работы с ним необходима библиотека LiquidCrystal_I2C. Думаю, вместо него можно использовать дисплей без I2C интерфейса и библиотеку LiquidCrystal. В этом случае правки скетча если и потребуются, то минимальные;
- Энкодер вращения с кнопкой. Я использую модуль KY-040.
- Микросхема MC14490 для подавления дребезга. С ней энкодер работает значительно лучше. Но в принципе можно обойтись и без неё или любого другого аппаратного подавителя дребезга, в этом случае выводы энкодера подключите непосредственно ко входам Ардуино.

- Возможность удобного описания меню;
- Возможность построения многоуровнего меню — само собой;
- Прокрутка длинных пунктов меню;
- Фишки вроде индикаторов, подсказывающих, что не все пункты уместились на экране или автоотключение подсветки тоже будут кстати.
Меню — это массив элементов sMenuItem, каждый из которых имеет свой уникальный ключ и ключ родителя для создания иерархии, а также название и ссылку на функцию-обработчик. В качестве ключа я использую перечисления, т.к. они удобнее чем просто числовые значения. Ключ mkBack имеет особое назначение: он нужен для пунктов меню «Back» — возврат на вышестоящий уровень меню.
Реакция на выбор определенного пункта меню может быть построена двумя способами:
- Задание функции обработчика. В этом случае параметр ReturnFromMenu должен быть установлен в 0. Если выбранный элемент не содержит дочерних элементов (т.е. это не подменю) и если для него задана функция-обработчик, то она будет вызвана. После выполнения функции управление будет передано обратно в меню.
- Анализ значения, возвращаемого функцией DrawMenu. Для этого параметр ReturnFromMenu должен быть установлен в 1. Анализ возвращаемого значения (ключа выбранного элемента меню) легко осуществить при помощи оператора switch.
Меню верхнего уровня в данном скетче содержит 2 элемента: первый для решения квадратных уравнений, второй просто как пример построения многоуровнего меню. Параметр ReturnFromMenu установлен в 0 и при выборе пунктов меню вызываются соответствующие обработчики. Так осуществляется задание коэффициентов квадратного уравнения и нахождение его корней (функции InputA, InputB, InputC, Solve). В обработчиках следует помнить об управлении подсветкой дисплея, для этого регулярно вызывается функция LCDBacklight. Функция loop содержит единственный вызов DrawMenu. Вся дальнейшая работа будет заключаться в отрисовке меню и выполнении функций-обработчиков.
Вот в общем-то и всё, остальное должно быть понятно из примера. Ну и в заключение дочитавшим до конца предлагаю видео работы этого меню:
90 комментариев:
Здравствуйте тёзка. Я «полный новичок» в ардуино, самостоятельно накидать менюшку с управлением энкодером, для меня, как-то сложновато. Поиск дал кучу вариантов.
Но Ваша работа наиболее качественная, и фишки в виде бегущего текста, вообще супер.
Но, сходу использовать скетч, не прокатило.
На версии IDE 1.6.7 (Uno R3) заругалась на строку «eMenuKey DrawMenu(eMenuKey Key)» словами «does not name a type». Подскажите, что можно сделать? И ой, чувствую, вопросов будет куча.
Здравствуйте!
Когда готовил публикацию у меня не было такой ошибки. А сейчас тоже поймал ее. Заметил, что если путь к файлу скетча содержит русские буквы, то ошибка не возникает. Пока не понял с чем это связано, попробую разобраться.
Вопросу будут — задавайте.
Попробовал оба варианта путей к скетчу, и с «C:\Новая папка\Arduino_KY040_Menu» и просто из корневухи С:\Arduino_KY040_Menu. Не выходит. Выдает целый список «недовольств»:
Arduino: 1.6.7 (Windows 7), Плата:»Arduino/Genuino Uno»
Arduino_KY040_Menu:192: error: ‘eMenuKey’ does not name a type
eMenuKey DrawMenu(eMenuKey Key) < // Отрисовка указанного уровня меню и навигация по нему
^
Arduino_KY040_Menu:172: error: invalid conversion from ‘void* (*)()’ to ‘void (*)()’ [-fpermissive]
>;
^
Arduino_KY040_Menu:172: error: invalid conversion from ‘void* (*)()’ to ‘void (*)()’ [-fpermissive]
Arduino_KY040_Menu:172: error: invalid conversion from ‘void* (*)()’ to ‘void (*)()’ [-fpermissive]
Arduino_KY040_Menu:172: error: invalid conversion from ‘void* (*)()’ to ‘void (*)()’ [-fpermissive]
Arduino_KY040_Menu:172: error: invalid conversion from ‘void* (*)()’ to ‘void (*)()’ [-fpermissive]
Arduino_KY040_Menu:172: error: invalid conversion from ‘void* (*)()’ to ‘void (*)()’ [-fpermissive]
Arduino_KY040_Menu:172: error: invalid conversion from ‘void* (*)()’ to ‘void (*)()’ [-fpermissive]
Arduino_KY040_Menu:172: error: invalid conversion from ‘void* (*)()’ to ‘void (*)()’ [-fpermissive]
Arduino_KY040_Menu:172: error: invalid conversion from ‘void* (*)()’ to ‘void (*)()’ [-fpermissive]
C:\Users\foto\AppData\Local\Temp\arduino_0e105e996471fbde0dc2a2dfa2384703\Arduino_KY040_Menu.ino: In function ‘void LCDBacklight(byte)’:
Arduino_KY040_Menu:175: error: default argument given for parameter 1 of ‘void LCDBacklight(byte)’ [-fpermissive]
^
Arduino_KY040_Menu:30: error: after previous specification in ‘void LCDBacklight(byte)’ [-fpermissive]
void LCDBacklight(byte v = 2);
^
exit status 1
‘eMenuKey’ does not name a type
Я использую версию 1.6.12. Она таких ошибок не выдавала, как и web редактор create.arduino.cc.
Скачал 1.6.7, немного изменил скетч, скомпилировалось без ошибок. Пробуйте.
По-быстрому спаял прототип KY-040, заменил lcd.begin на lcd.init, и всё заработало!
Слов нет, одни ассемблер-еденицы в адрес Вашей кармы! Шикарно! Да ещё и с большинством комментариев, да на русском . мне, как чайнику, просто сказка!
Но, когда через 20 сек., погас экран, у меня что-то внутри ёкнуло!
Да Вы, батенька, шутник!
Такой «спящий режим», для работы от батареек, нужная функция. Она отключаема?
И ещё момент: подскажите, как можно вставить первой строкой — просто текст (заголовок меню/подменю), и чтобы курсор заголовка не касался? По-простому lcd.print»Заголовок», не прокатило. :)
Ещё раз — не выражаемая Вам благодарность за труды!
Для управления подсветкой по скетчу разбросаны вызовы LCDBacklight: без параметров функция гасит подсветку через заданный интервал времени (BacklightDelay); параметры 0 и 1 — для выключения и включения подсветки соответственно. Если подсветка не должна отключаться автоматически, то можно просто выкинуть из программы все вызовы LCDBacklight без параметра и явно включать/выключать ее где нужно.
А чтобы выводился заголовок можно попробовать следующее:
1. В переменной ItemsOnPage хранится количество пунктов меню, выводимых на экран. По умолчанию ее значение равно количеству строк. Уменьшите ее на единицу, чтобы зарезервировать одну строку для вывода заголовка.
2. В функции DrawMenu поправить все вызовы lcd.setCursor(x, y): их нужно привести к виду lcd.setCursor(x, y + 1) — чтобы пункты меню и курсор выводились со второй строки. Не обязательно жестко прописывать +1, можно использовать переменную, чтобы была возможность обнулить ее и не резервировать место для заголовка в проектах где он не нужен.
3. Освободившуюся первую строку теперь можно использовать для вывода заголовка. Делать это лучше внутри условия if (NeedRepaint) <, иначе (если выводить заголовок перед циклом) при возврате из подменю заголовок не обновится. Ну и чтобы не печатать его заново каждый раз при прокрутке меню, когда NeedRepaint присваивается значение 1, я бы ввел еще одно значение - 2. То есть:
NeedRepaint = 0 — перерисовывать меню/заголовок не требуется;
NeedRepaint = 1 — нужно прокрутить меню вверх/вниз, заголовок не трогаем;
NeedRepaint = 2 — используется когда нужно вывести заголовок и меню, а именно после возврата из подменю (в ветке case eButton:).
Но это всё так, навскидку.
Разумеется, заголовок прокручиваться не будет, это надо учитывать. Добавить прокрутку можно, но, мне кажется, это перегрузит меню.